How to Design a Custom 3D Embroidered Caps: From Concept to Bulk Production Creating a standout line of custom 3D embroidered caps require...
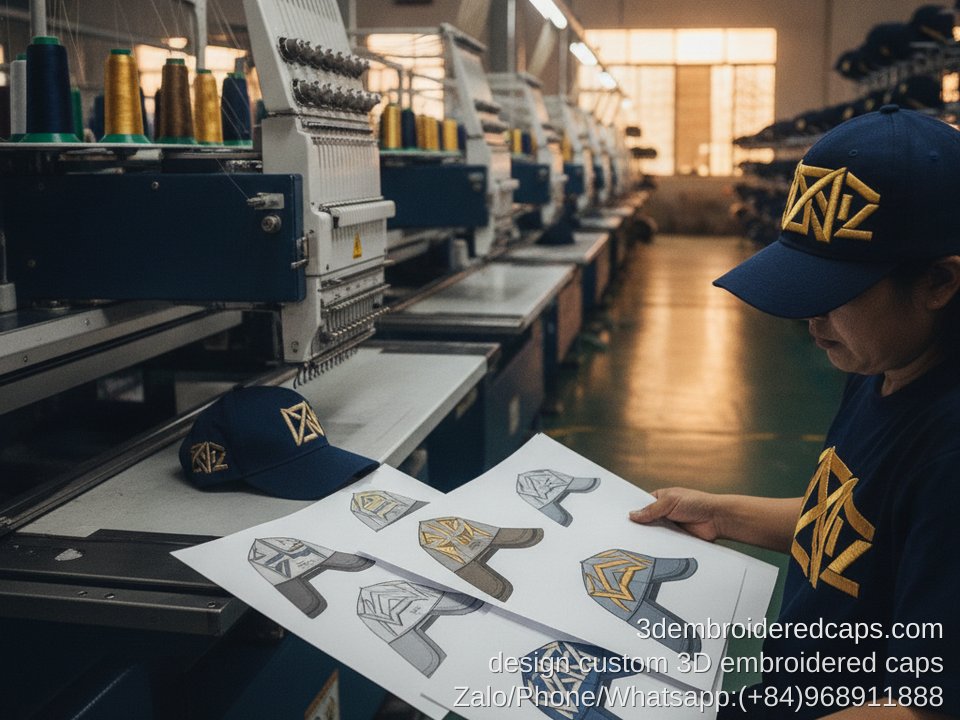
How to Design a Custom 3D Embroidered Caps: From Concept to Bulk Production
Creating a standout line of custom 3D embroidered caps requires a strategic approach, blending creative vision with manufacturing realities. For designers and brand owners embarking on their first cap order, understanding the entire process is crucial for success. This guide will walk you through the essential steps to design custom 3D embroidered caps, ensuring your vision translates seamlessly from initial concept to high-quality bulk production.
At 3Dembroideredcaps.com, operated by Gold Garment in Ho Chi Minh City, Vietnam, we specialize in bringing your unique cap designs to life. With over 10 years of experience, our factory-direct pricing and worldwide shipping make us an ideal partner for brands seeking quality and value. We understand that a well-executed design is the foundation of a successful product, and we are here to support you at every stage.
The journey of designing custom 3D embroidered caps involves several key phases, from ideation and artwork preparation to understanding technical specifications and production logistics. By meticulously following these steps, you can confidently create caps that not only meet but exceed your brand's expectations.
Phase 1: Conceptualization and Design Ideation
The initial spark for your custom 3D embroidered caps often comes from a brand's identity, a specific campaign, or a unique aesthetic. This is where you define the core message and visual appeal of your headwear. Consider your target audience, the overall brand aesthetic, and the purpose of the caps – are they promotional items, merchandise for sale, or part of a uniform?
Think about the overall style of the cap itself. Will it be a classic baseball cap, a trendy snapback, a comfortable trucker cap, or something else entirely? Understanding the different cap types explained: baseball, snapback, trucker, bucket & more can help you choose the best silhouette to complement your design.
Key elements to consider during conceptualization:
- Brand Identity: How does the cap design align with your brand's logo, colors, and overall message?
- Target Audience: Who are you designing for, and what styles and themes would resonate with them?
- Cap Style: Select the base cap silhouette that best suits your design and intended use.
- Embroidery Placement: Where on the cap will the 3D embroidery be most impactful? Common areas include the front, side, back, and visor.
- Color Palette: Choose colors that are both visually appealing and consistent with your brand guidelines.
Phase 2: Artwork Preparation for 3D Embroidery
Once your concept is clear, the next critical step is preparing your artwork for the embroidery process. This is where the magic of 3D embroidery truly takes shape. The quality of your artwork directly impacts the final embroidered product, so attention to detail is paramount. This phase is crucial for a smooth 3D embroidered caps design process.
For 3D embroidery, the artwork needs to be more than just a flat logo. It requires specific considerations to achieve the raised, dimensional effect. This often involves simplifying complex designs and ensuring clean lines that will translate well into stitches. Vector formats are generally preferred for their scalability and crispness.
Essential artwork requirements for 3D embroidered caps:
- File Format: High-resolution vector files such as .AI, .EPS, or .SVG are ideal. If vector is not possible, a very high-resolution .PNG or .JPEG (300 DPI or higher) can be used, but may require additional work for digitizing.
- Color Separation: Ensure all colors are clearly defined and separated. Pantone (PMS) color codes are highly recommended for accurate color matching.
- Design Complexity: Extremely fine details or very small text may be challenging to render effectively in 3D embroidery. Simplifying these elements can improve the final outcome.
- Embroidery Area: Clearly indicate the intended size and placement of the embroidery on the cap.
- 3D Effect Specification: If you have a specific vision for the puff or height of the 3D embroidery, communicate this clearly.
This stage also involves digitizing your artwork, which is the process of converting your 2D design into a format that embroidery machines can read. This is a specialized skill that our team at Gold Garment excels at. Understanding the nuances of 3D embroidery artwork preparation is key to a successful outcome.
Phase 3: Understanding the Cap Tech Pack
A cap tech pack, or technical package, is the blueprint for your custom cap. It is an essential document that communicates all the necessary specifications to the manufacturer. For anyone looking to design custom 3D embroidered caps, a comprehensive tech pack is non-negotiable. It ensures that both you and the factory are on the same page regarding every detail of the product.
This document bridges the gap between your design vision and the manufacturing floor. It details everything from the cap's construction and materials to the exact specifications for your 3D embroidery. A well-documented tech pack minimizes errors and streamlines the production process, saving time and resources. For a deeper understanding of garment tech packs, consult our detailed guide at Vietnam factory tech pack guide.
Key components of a cap tech pack:
- Bill of Materials (BOM): Specifies all the materials to be used, including fabric type, thread colors (PMS codes), and any trims like labels or patches.
- Construction Details: Outlines how the cap should be assembled, including panel construction, stitching types, and finishing.
- Measurements and Sizing: Provides precise dimensions for all parts of the cap, ensuring consistent sizing across your order.
- Artwork Specifications: Includes the digitized embroidery file, dimensions, stitch count, and any specific instructions for 3D puff embroidery.
- Colorways: Details all the different color options for the cap and the corresponding embroidery.
- Labeling and Packaging: Specifies placement and type of brand labels, hangtags, and how the final caps should be packaged for shipping.
A detailed tech pack is your best tool for ensuring the factory produces exactly what you envision. It's a critical part of the 3D embroidered caps design process.
Phase 4: Material Selection and Color Choices
The choice of fabric and color significantly impacts the look, feel, and durability of your custom 3D embroidered caps. At Gold Garment, we offer a wide range of materials to suit different needs and aesthetics. Understanding these options is key to a successful design.
Common materials for caps include cotton twill, polyester, canvas, and blends. Each offers a different texture and drape. For 3D embroidery, the fabric's stability and weave are important to support the raised design without distortion. Our 3D embroidered caps fabric guide: choosing the right material for your order provides in-depth information on these choices.
Color selection is also vital. Consider how your chosen colors will interact with the embroidery thread. Bold color combinations can make a statement, while more subtle palettes offer a sophisticated look. Always refer to your brand's color palette and use PMS codes for accurate reproduction.
Phase 5: Prototyping and Sampling
Before committing to a large production run, it is essential to create a prototype or sample of your custom 3D embroidered caps. This allows you to physically inspect the design, quality, and fit. It’s your opportunity to catch any discrepancies and make necessary adjustments.
The sampling process is a critical feedback loop in the 3D embroidered caps design process. You'll review the embroidery, the cap construction, the color accuracy, and the overall aesthetic. This is also where you can assess the 3D effect of the embroidery. Any revisions to the artwork or specifications are made at this stage.
A real example of collaboration with a manufacturer can be seen in the work of custom cap factory Vietnam Gold Garment, where meticulous attention to detail in samples ensures client satisfaction before bulk orders commence.
Phase 6: Bulk Production and Quality Control
Once you approve the sample, the production of your custom 3D embroidered caps can begin. Gold Garment, based in Ho Chi Minh City, Vietnam, is equipped to handle bulk orders efficiently, maintaining factory-direct pricing and consistent quality. Our minimum order quantity (MOQ) of 100 pieces per style makes it accessible for many brands.
Throughout the bulk production phase, rigorous quality control measures are implemented. This includes checking that each cap matches the approved sample, verifying color accuracy, ensuring embroidery quality, and inspecting for any manufacturing defects. Our commitment to quality ensures that every cap leaving our factory meets our high standards.
Understanding the implications of order size is also important. As detailed in our guide on minimum order quantity for 3D embroidered caps: what every brand should know, meeting MOQs ensures efficiency and cost-effectiveness in manufacturing.
Phase 7: Shipping and Logistics
As a global supplier, 3Dembroideredcaps.com offers worldwide shipping. We work with reliable logistics partners to ensure your custom caps reach you safely and on time. Clear communication regarding shipping timelines and costs is provided to our clients, who hail from regions including the USA, Europe, Australia, and Southeast Asia.
The final delivery of your custom 3D embroidered caps is the culmination of a well-managed design and production process. We aim to make this final step as seamless as possible. Many brands also expand their product offerings and partner with complementary manufacturers, such as a private label socks manufacturer, to create a cohesive product line.
Frequently Asked Questions
Q: What is the minimum order quantity (MOQ) for custom 3D embroidered caps?
A: Our standard MOQ is 100 pieces per style. This allows us to offer competitive factory-direct pricing while catering to brands of various sizes.
Q: Can you help with the design process if I have a basic idea but no finished artwork?
A: Absolutely. Our experienced team can assist with artwork refinement and digitizing to ensure your design is perfectly suited for 3D embroidery. We guide you through the entire 3D embroidered caps design process.
Q: How long does it take to produce a bulk order of custom 3D embroidered caps?
A: Production timelines vary depending on the complexity of the design and the order volume. Typically, after sample approval, bulk production can take 3-5 weeks. We provide estimated timelines based on your specific order requirements.
Q: What is the difference between OEM and Private Label for custom caps?
A: OEM (Original Equipment Manufacturer) involves producing caps based on your provided design and specifications. Private Label often means taking existing cap styles and branding them with your logo. Our guide on OEM vs Private Label 3D embroidered caps manufacturing: which model fits your brand? explains this in more detail.
Partner with 3Dembroideredcaps.com for a streamlined and professional experience in bringing your custom 3D embroidered caps vision to reality.
Let us transform your creative concepts into high-quality, custom-made caps.
📩 Request a Free Quote — Response Within 5 Minutes
🌎 Website: 3dembroideredcaps.com
Factory-direct pricing · MOQ from 100 pcs/style · Sample development · Worldwide shipping


COMMENTS